Stripe
Stripe is the default payment gateway for Statamic Resrv. In this page, we'll go over the setup required for Stripe to work correctly.
WARNING
Even though Stripe is thoroughly tested with Resrv, it's suggested that you test the payment gateway in test mode before going live.
Stripe account
Obviously, you need to create a Stripe account. You'll need your private key and the public key, and access to your account to create a webhook.
Including Stripe's Javascript
You'll need to include Stripe's Javascript in your layout page:
<!-- resources/views/layout.antlers.html -->
<!doctype html>
<html lang="{{ site:short_locale }}">
    <head>
        <meta charset="utf-8">
        <meta http-equiv="X-UA-Compatible" content="IE=edge">
        <meta name="viewport" content="width=device-width, initial-scale=1">
        <title>{{ title ?? site:name }}</title>
        {{ vite src="resources/js/site.js|resources/css/site.css" }}
        {{ livewire:styles }}
        <link rel="stylesheet" href="/vendor/statamic-resrv/frontend/css/resrv-frontend.css">
    </head>
    <body class="bg-gray-100 font-sans leading-normal text-gray-800">
        <div class="mx-auto px-2 lg:min-h-screen flex flex-col items-center justify-center">
            {{ template_content }}
        </div>
        <script src="/vendor/statamic-resrv/frontend/js/resrv-frontend.js"></script>
        <script src="https://js.stripe.com/v3/"></script>
        {{ livewire:scripts }}
    </body>
</html>
Adding your keys to .env
For security reasons, your Stripe keys are not stored in the addon's configuration but are instead stored in your .env file. You need to add the following keys to your .env file:
RESRV_STRIPE_PUBLISHABLE=pk_live_.....
RESRV_STRIPE_SECRET=sk_live_.....
In case you have cached your config, remember to clear the config cache when making changes to the .env file:
php artisan config:clearSetup the webhook
In order to receive payment information from Stripe, you need to set up a webhook. You can do this in the Stripe dashboard under the "Developers" section. Select the "Webhooks" tab and click on "Add endpoint".
At the endpoint URL, you need to enter the URL of your site, followed by /resrv/api/webhook. So if your site is https://resrv.dev, the endpoint URL should be https://resrv.dev/resrv/api/webhook. Please note that HTTPS is required.
At the "Select events to listen to" section, you need to select the following events:
- payment_intent.canceled
- payment_intent.payment_failed
- payment_intent.succeeded
After you've successfully saved your webhook, click on "Reveal" under the "Signing secret" section:
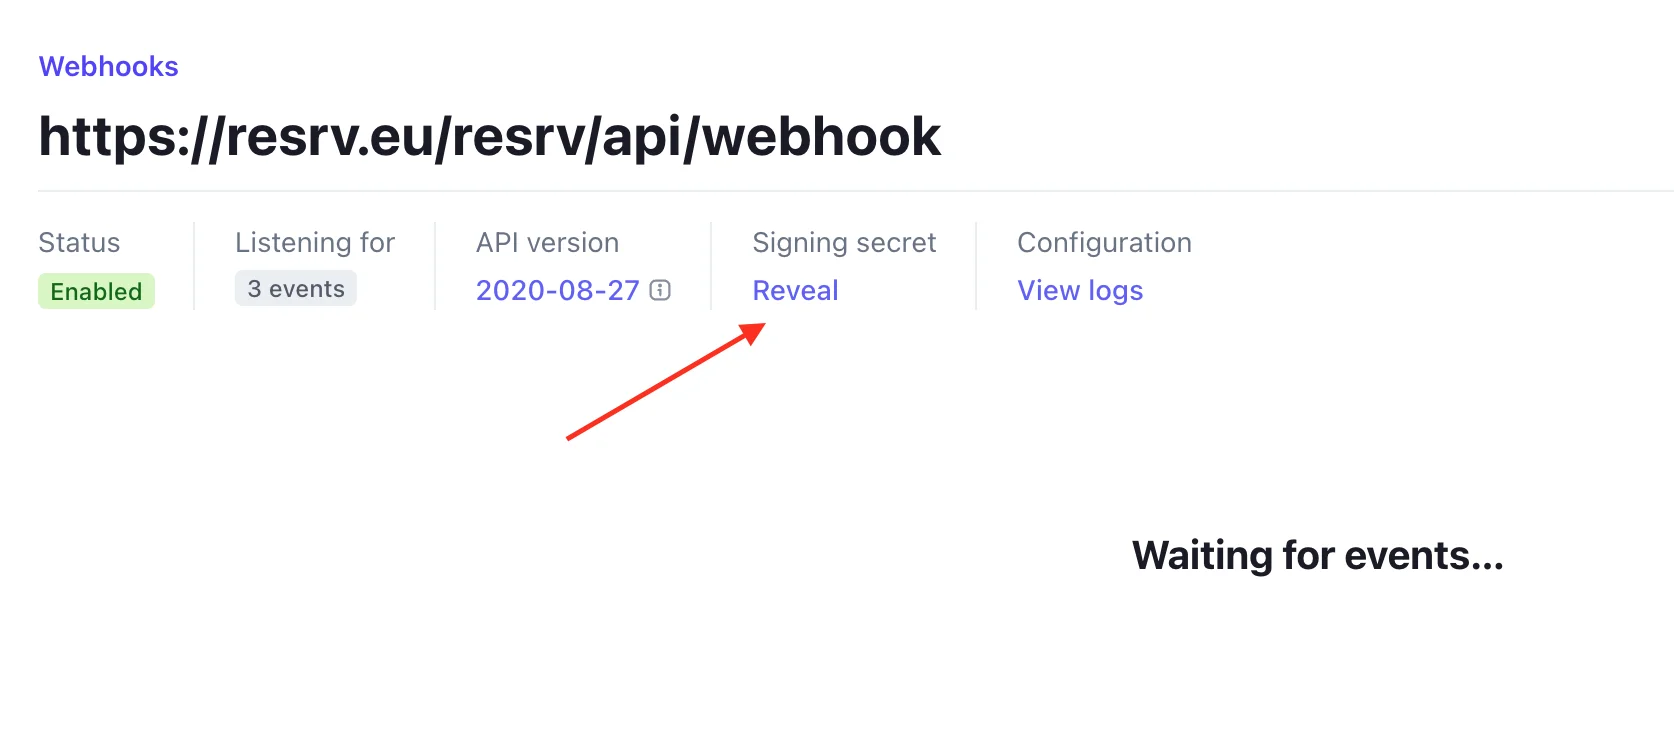
Copy the webhook secret and add it to your .env file as well:
RESRV_STRIPE_WEBHOOK_SECRET=whsec_.....Next steps
That's it! You should now be able to receive payments from Stripe. Again, it's suggested that you test the payment gateway in test mode before going live.