Checkout
The Checkout component handles the whole checkout process: it allows the user to select extras or options, lets them add a coupon for a discount, gets the user's personal details, and handles the payment.
In this page, we'll go over the setup required for the Checkout component to function correctly and how to customize it to fit your needs.
Component basics
Before using this component, let's go through the required steps to get it working:
- You need to create an Entry that will be used as the checkout page. This Entry can follow your website's design but must have a different template that will include the
Checkoutcomponent. - You also need to create a "Checkout complete" page. Again, this page can be like any page on your site, but in its template, you must include the
resrv_checkout_redirecttag. - You need to create the checkout form. If you used the installer, a sample checkout form is already published for you to edit.
- You must configure Stripe or Mollie in order to accept payments. This is explained on the respective pages: Stripe and Mollie.
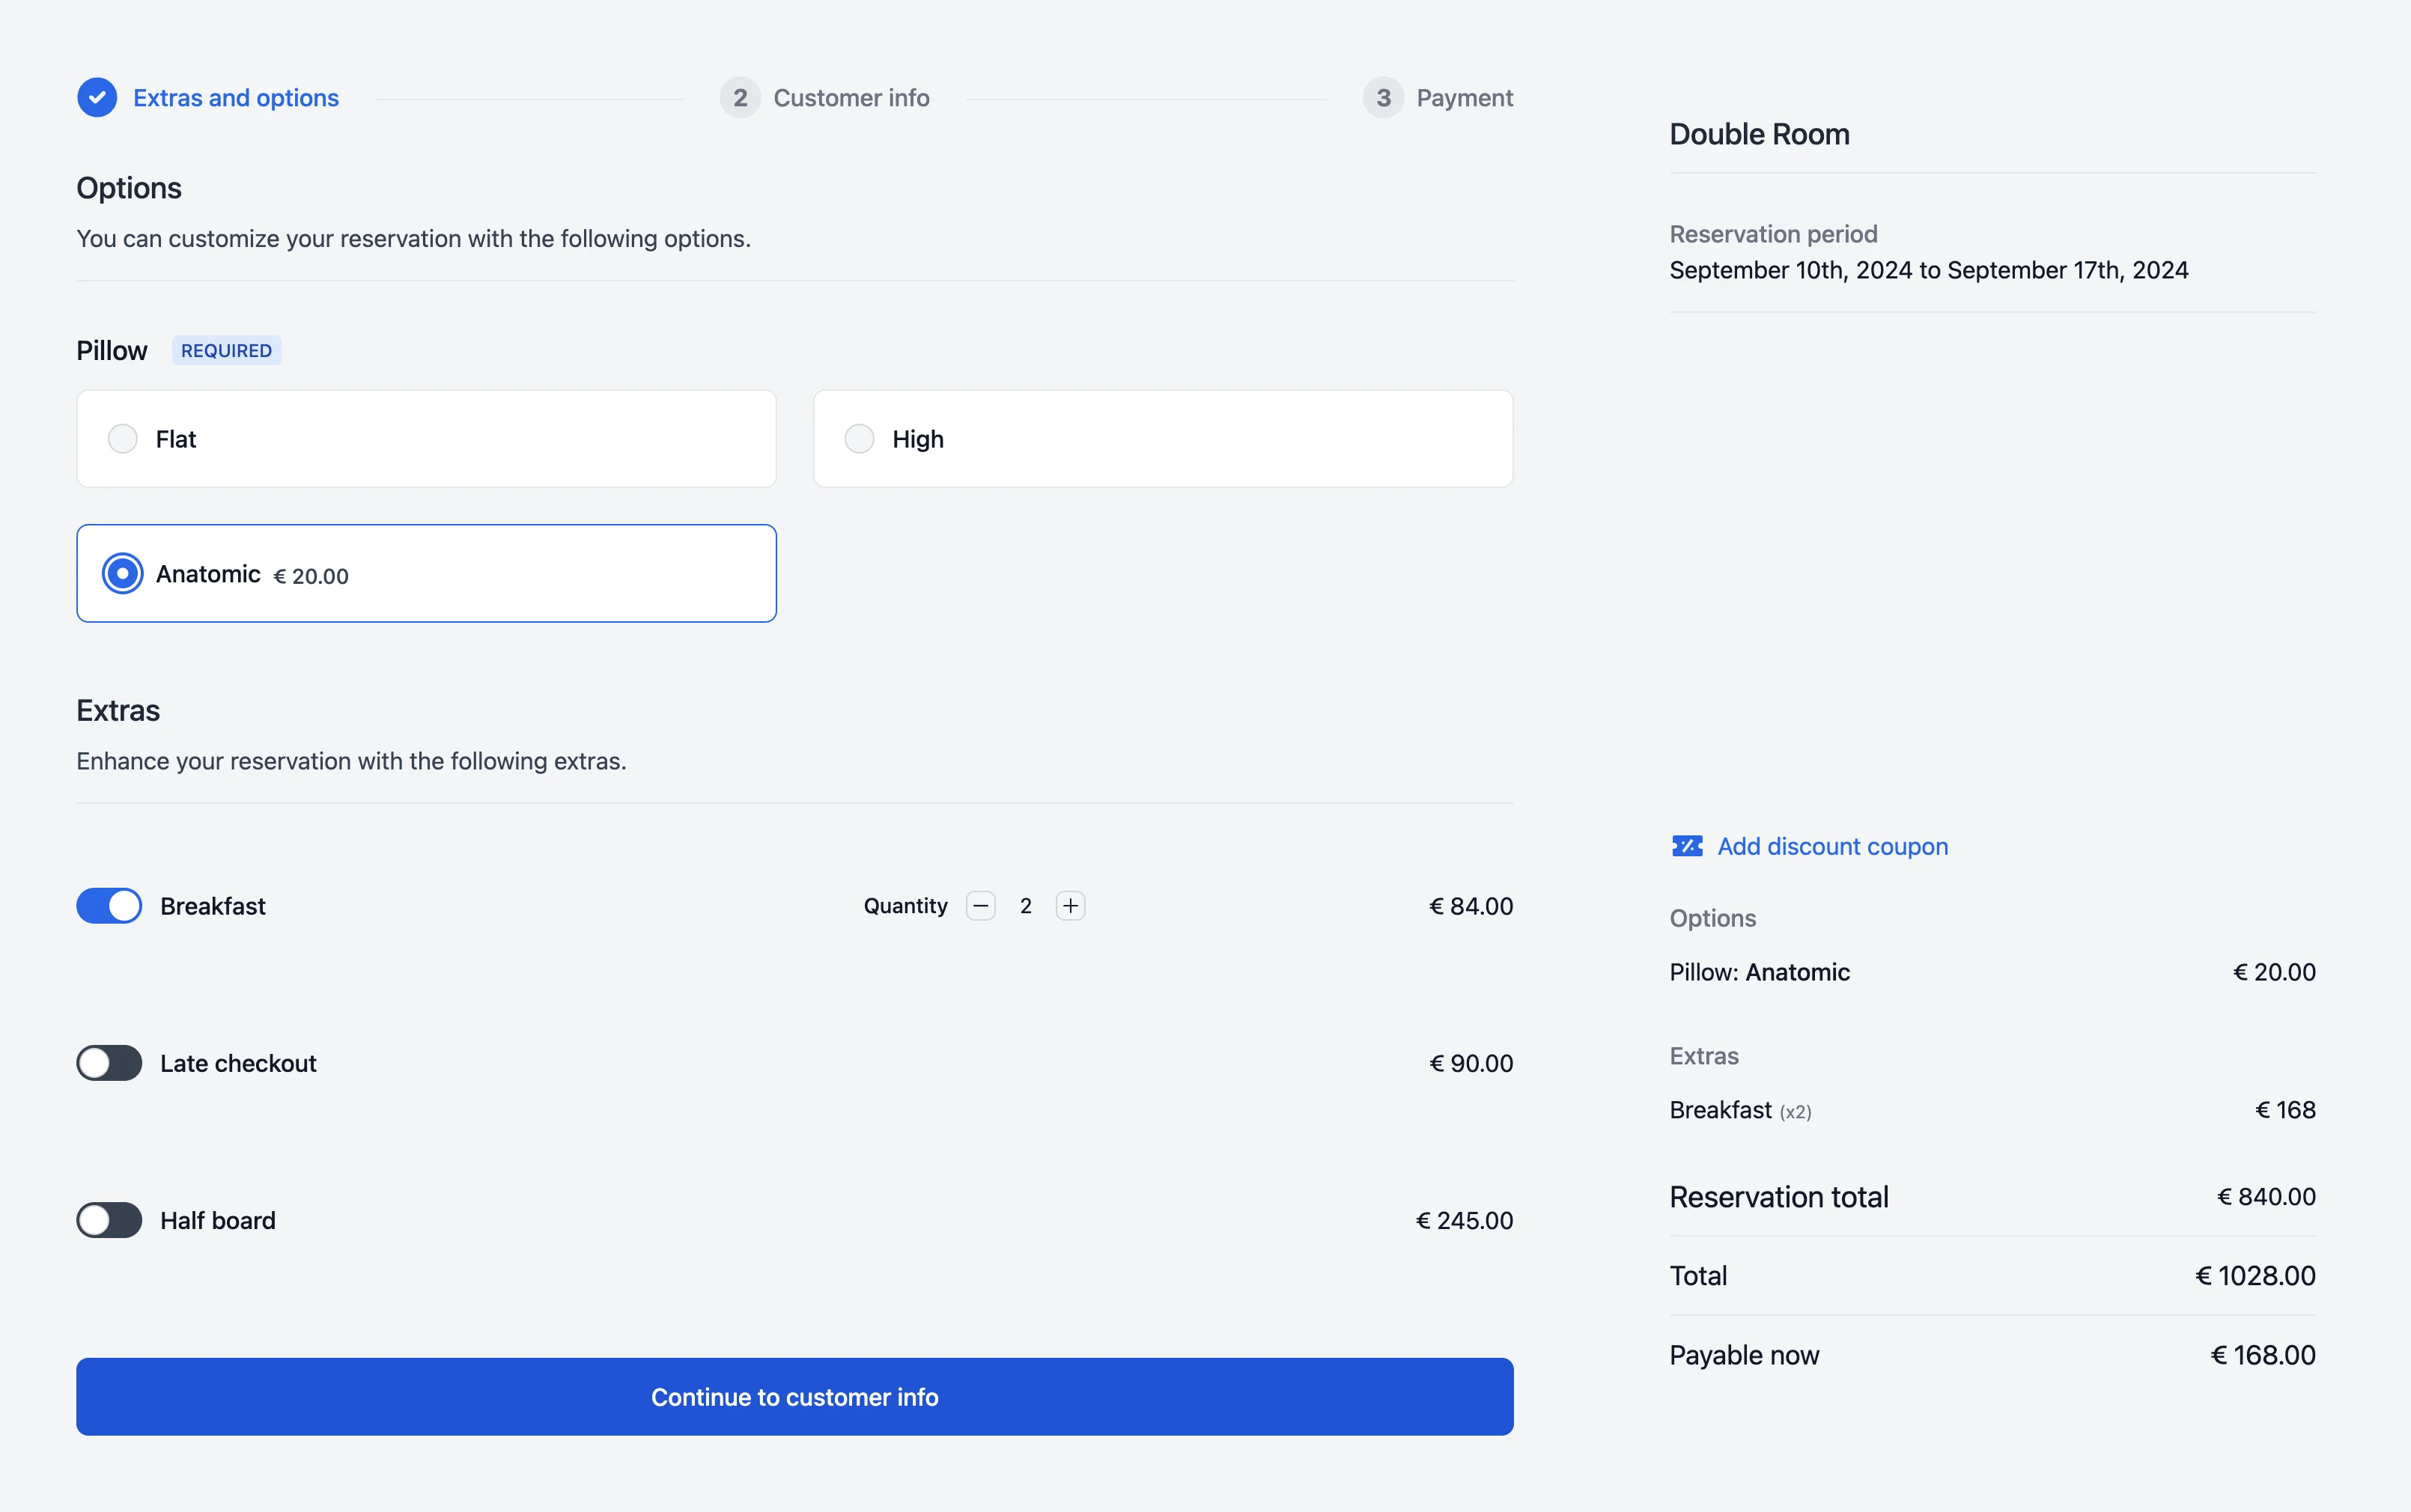
Checkout Component
To load the Checkout component, first create a new Entry in your default collection (for example "Pages"). Create a custom template for this page and include the Checkout component:
{{ livewire:checkout }}As simple as that! The component has a few properties that you can set to customize it to your needs:
| Property | Type | Default | Description |
|---|---|---|---|
| enableExtrasStep | boolean | true | By default the component starts with a step that allows the user to select Extras / Options. If you don't use them, you can disable it by setting this to false. |
| enableCoupon | boolean | true | By default the component allows the user to add a discount coupon, you can disable this here if you don't use them. |
| view | string | "checkout" | You can override the view that is used to render the component. Expects a name.blade.php file in the /resources/views/vendor/statamic-resrv/livewire folder. |
Checkout Complete
After the checkout is complete, the user will be redirected to the "Checkout complete" page. Again, this page can be like any page of your site but in its template you must include the resrv_checkout_redirect tag:
{{ resrv_checkout_redirect }}
    <div class="w-full">
        <div class="text-xl xl:text-2xl font-bold mb-3 lg:mb-4">
            {{ title  }}
        </div>
        <p class="lg:text-lg">
            {{ message }}
        </p>
    </div>
{{ /resrv_checkout_redirect }}
This tag displays an automated message depending on the status of the payment. Besides that, inside the tag you can access a reservation variable that contains the reservation data. This is the correct place to add any goal-based events, like Analytics.
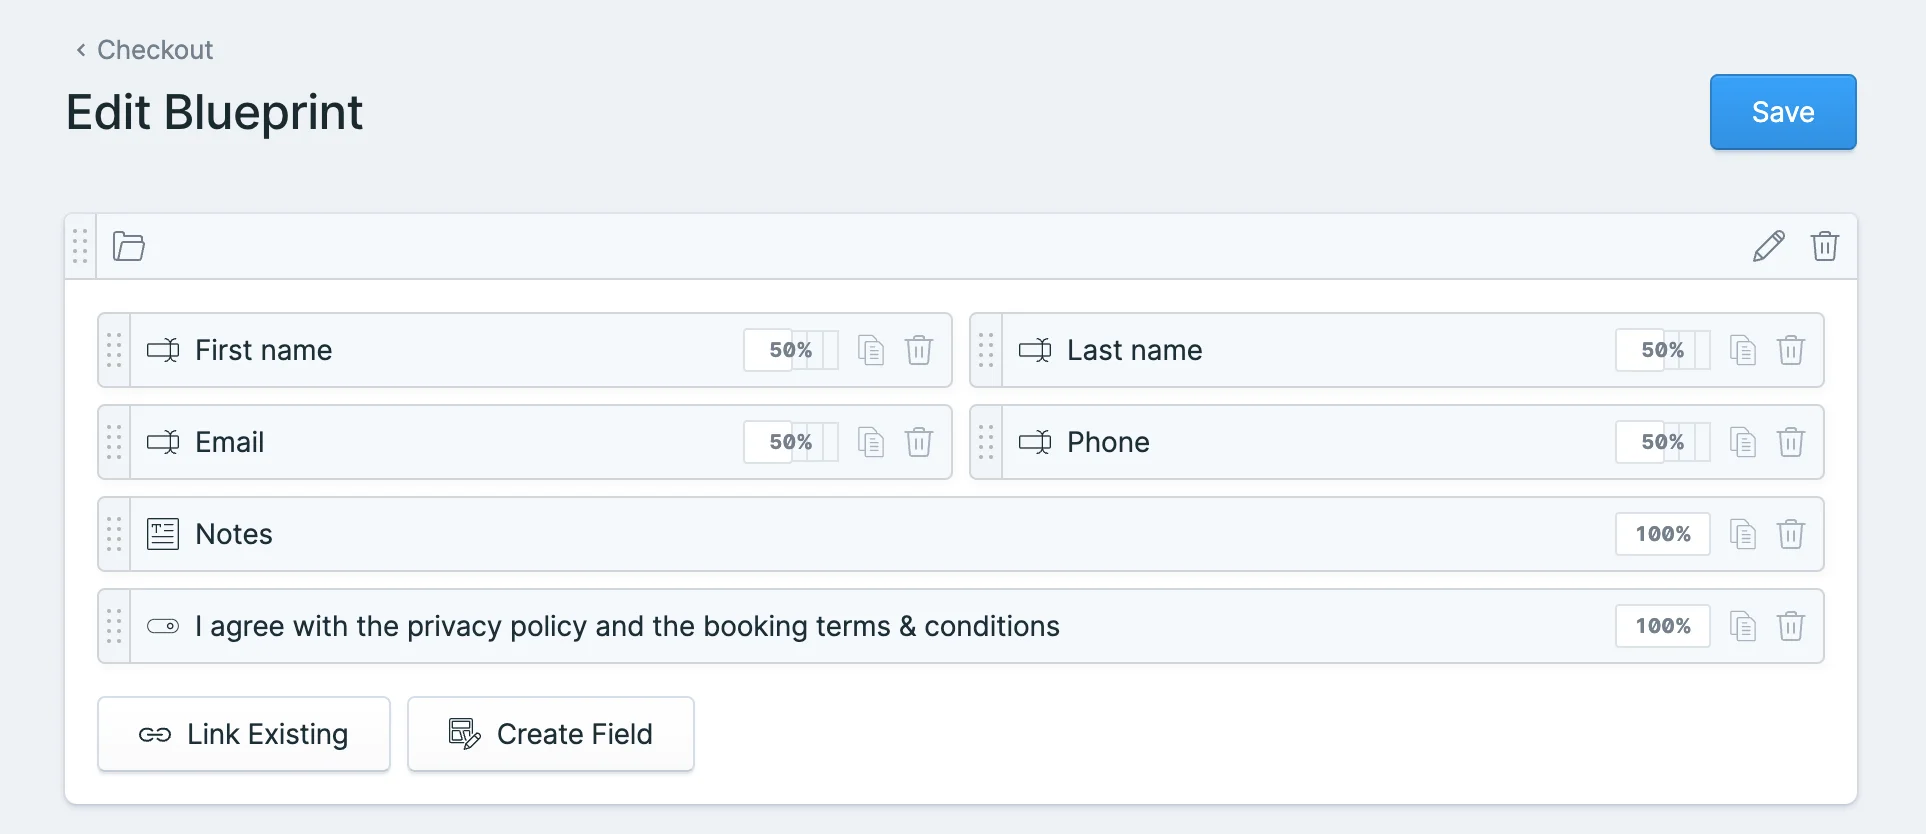
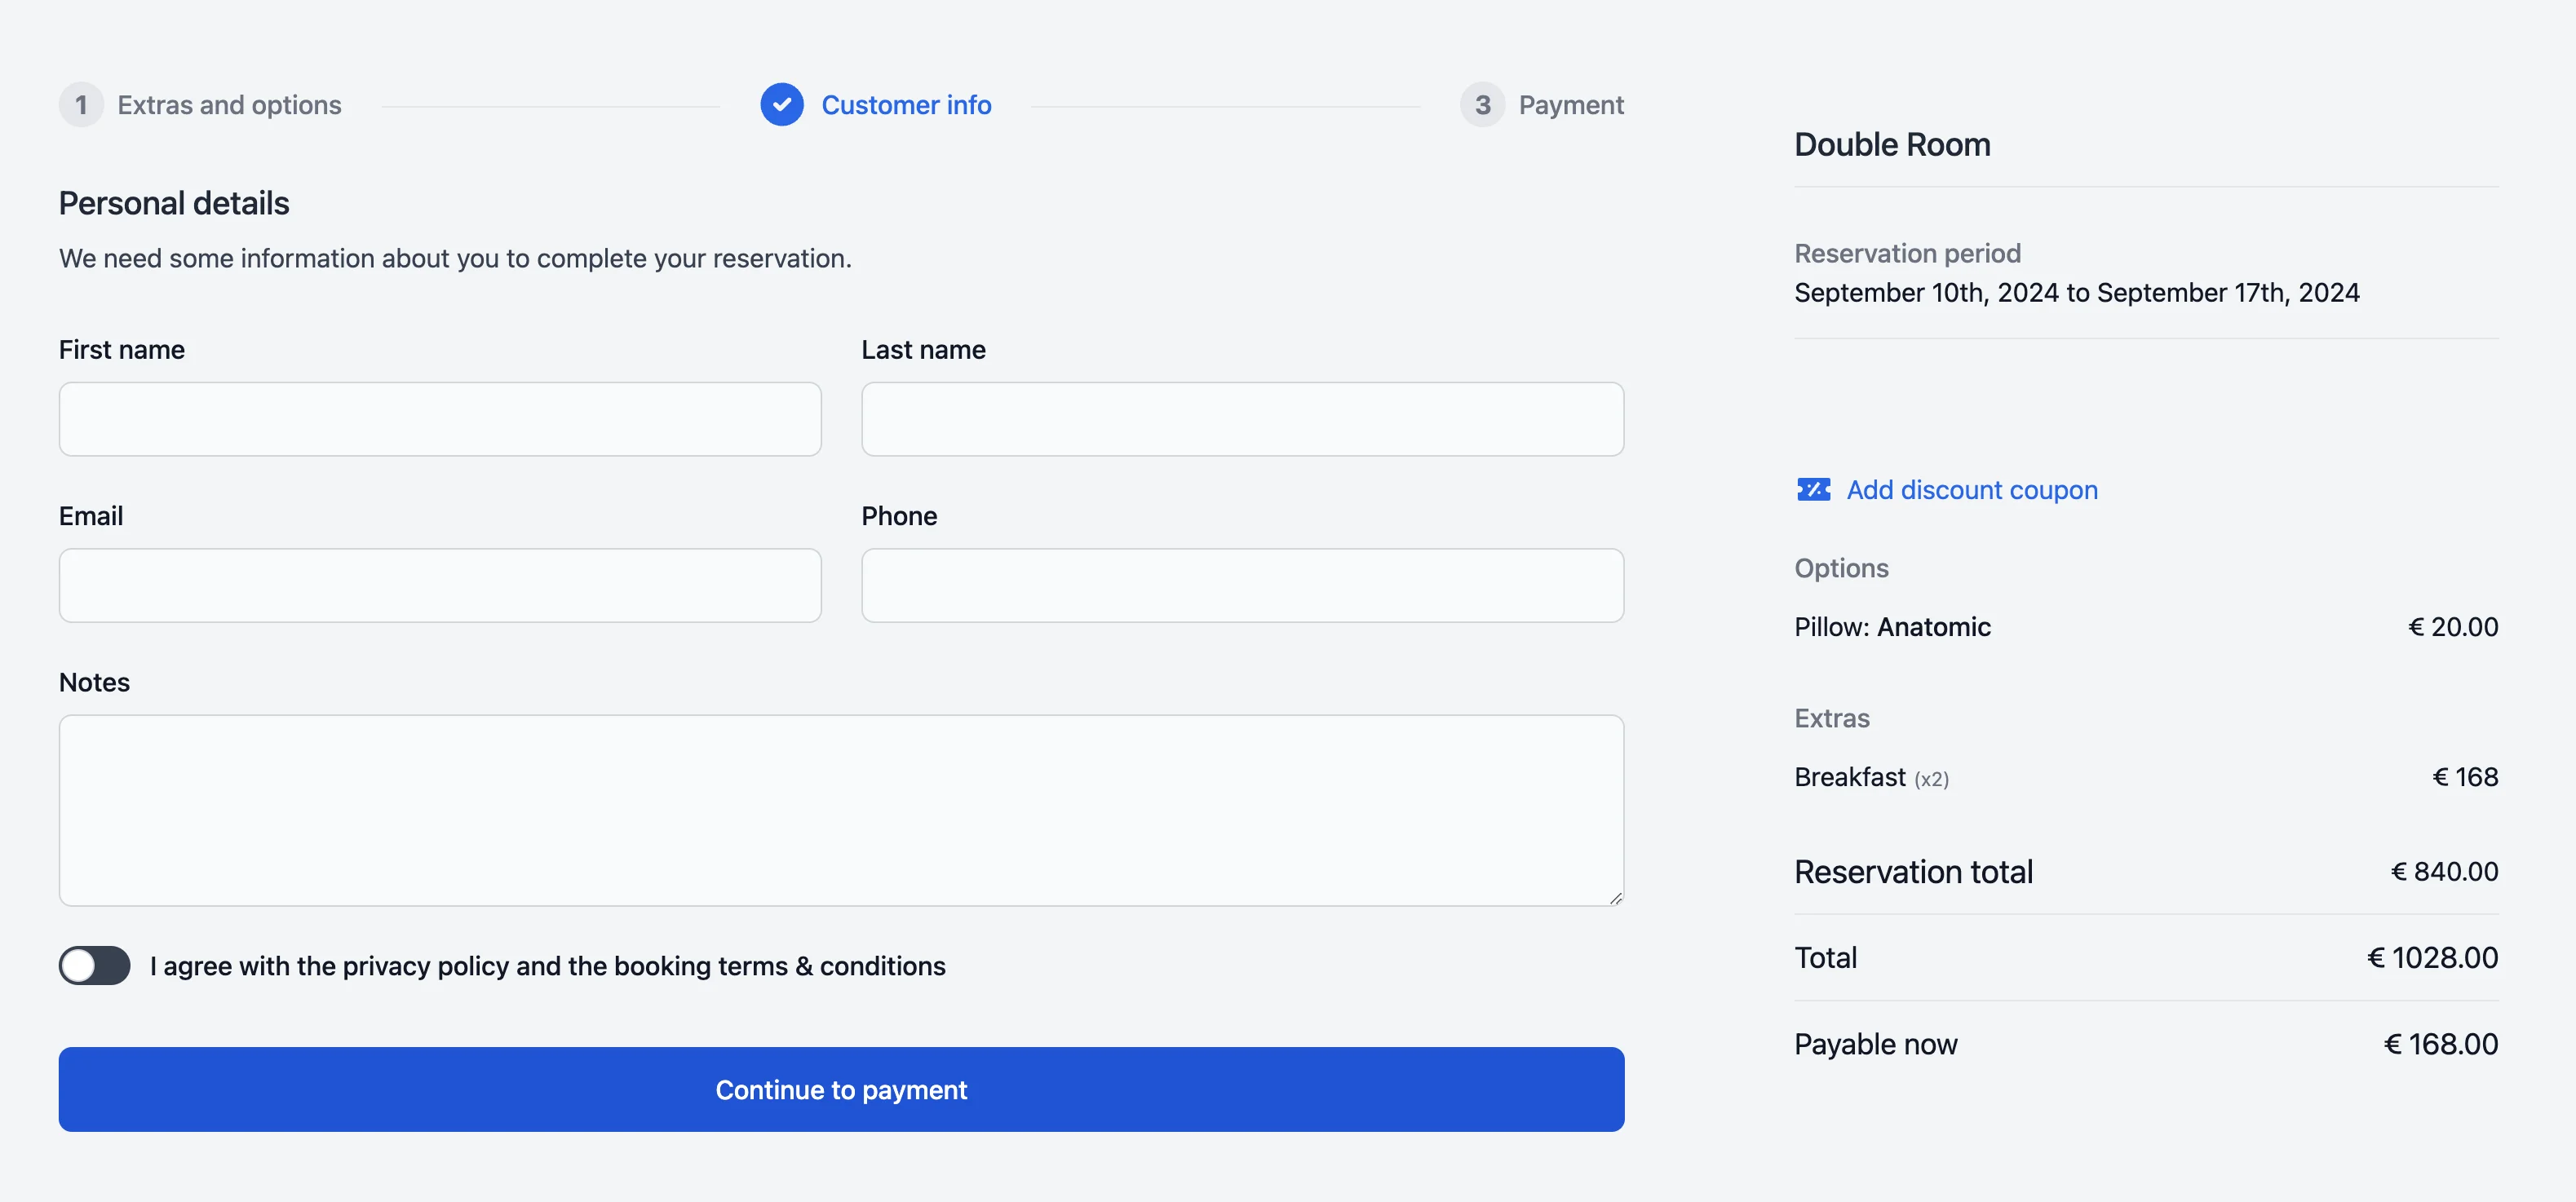
Checkout form
We are leveraging the Statamic form builder in order to allow you to customize the checkout form. If you published it during the installation process, you will find it in your Blueprints.
ALWAYS KEEP THE EMAIL FIELD
The email field (with the handle email) is required for the checkout emails to work. Always make sure to keep it in your checkout form.
You can use Statamic's validation tab to add validation to your fields. The fields that are implemented in the frontend are:
- Text
- Radio
- Checkboxes
- Select
- Textarea
- Integer
- Toggle
- Dictionaries NEW
The dictionary Countries will display an AlpineJS filtered select box. Resrv adds the dictionary Country Phone Codes which displays a select box with all country codes plus an input box for the actual phone number.
Required Configuration
For the checkout to work correctly, you need to select the Checkout Entry, the Checkout Complete Entry, and the Checkout form you created in the previous steps, in the addon's configuration page.
Finally, you must also set up and enable a payment gateway.
Skip Payment
If the price of the reservation is zero, or if dynamic pricing is used that makes it zero, the checkout will be completed without any payment. This means you can use only the reservation part of Resrv. For example, if you have a restaurant that takes reservations but doesn't charge for them, you can simply set the price to zero.